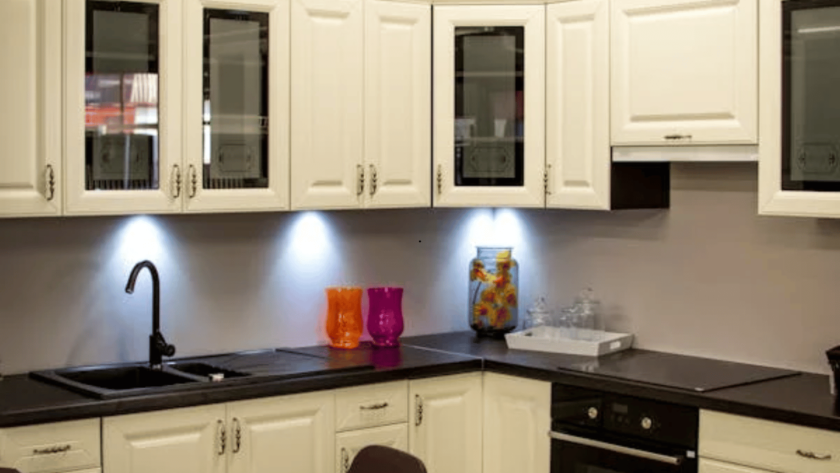
Transforming your kitchen doesn’t have to break the bank. In fact, with a bit of creativity and elbow grease, you can build your kitchen cabinets for under $200! This beginner-friendly tutorial will guide you through the process, offering insights into achieving a professional look at a fraction of the cost of pre-made units. By the end of this guide, not only will you have budget-friendly cabinets, but you’ll also gain valuable DIY skills and confidence in your abilities.
Tools and Materials You Will Need
To get started on your DIY kitchen cabinets, you’ll need a few essential tools you might already have around your home. If not, consider renting them from a hardware store to decrease costs. Basic tools include a screwdriver, drill, saw, tape measure, and clamps.
For materials, which should all stay under the $200 mark, you’ll need plywood sheets, screws, nails, glue, cabinet hardware such as hinges and knobs, and optionally, paint or varnish. Don’t forget sandpaper and wood filler for those finishing touches. A cost breakdown might look like this: $60 for plywood, $30 for hardware, $40 for tools (if rented), and $40 for finishing supplies.
Step-by-Step Guide to Building DIY Kitchen Cabinets
Measure and Plan Your Cabinets
Accurate measurements are crucial for a successful cabinet build. Start by measuring your kitchen space and deciding on the dimensions of your cabinets. Simple layout plans are available online and can be particularly helpful for beginners unfamiliar with construction blueprints. Taking the time to plan will save headaches later and ensure a perfect fit.
Cutting the Wood Panels
Once you have your plans, it’s time to cut your plywood to size. Precision is critical here, so ensure your saw is sharp and your measurements are exact. Many local stores offer wood-cutting services if you’re nervous about cutting at home. This can be an excellent option for those without access to power tools or those seeking perfectly straight edges.
Assembling the Cabinet Frame
Framing your cabinet is where your project starts to take shape. Begin by laying out your panels and fastening them with screws or nails, ensuring everything is perfectly aligned for stability. Using clamps can help hold everything in place as you work, preventing any shifts that might cause issues when fitting your shelves and doors.
Installing Shelves and Backing
With your frame assembled, it’s time to add shelving and backing. Securely attach your shelves using screws or nails, making sure they are level and sturdy. For the cabinet back, inexpensive plywood works perfectly. It provides a clean finish and adds structural integrity to your cabinets.
Attaching Cabinet Doors
Once your shelves and backing are installed, it’s time to hang the cabinet doors. Fit your hinges carefully, checking for smooth opening and closing. Don’t be afraid to get creative with door decoration—budget-friendly options such as stencils or adhesive vinyl can add a touch of flair without significant cost.
Finishing Touches
To achieve a polished, professional finish, sand down any rough edges or surfaces before painting or staining. Choose paints or stains that match your kitchen’s aesthetic, taking care to apply them evenly. A few coats might be necessary, but the effort will result in a cabinet that looks as good as any store-bought option.
Cost-Saving Tips and Tricks
When sourcing materials affordably, consider looking for reclaimed wood or upcycled materials. Not only are these often cheaper, but they also add character to your cabinets. Additionally, watch for local hardware store deals or online discounts. Planning can help you avoid costly mistakes, such as buying excess materials or having to redo parts of your project due to errors.
Common Mistakes and How to Avoid Them
Even the most seasoned DIYers make mistakes, but you can avoid common pitfalls with some preparation. Ensure all your measurements are accurate by double-checking before cutting. When assembling, take care to align panels and shelves precisely and avoid over-tightening screws, which can damage the wood. If issues arise, don’t panic—most can be fixed with creativity and patience.
Painting and Finishing on a Budget
There are many affordable options for finishing your cabinets, from traditional paints and varnishes to more unique choices like chalk or milk paint. These can provide a high-end look without the hefty price tag. To get a professional finish, consider using a spray gun for even application or a high-quality brush to avoid streaks.
Installation and Final Adjustments
Once your cabinets are complete, it’s time to install them in your kitchen. Secure them to the walls safely, adjusting the doors and hardware for proper alignment. Once everything is in place, give your new cabinets a final check for stability and make any necessary adjustments. Enjoy the satisfaction of a job well done and the transformation of your kitchen space.


